Handling of Claims
Here is described how to handle claims in the system.
It is best to work in the "Worksheet" where all claims are in one place and you can use filters to work better with them.
Actions
1. Worksheet:
On the work sheet you can filter by customer and date. It is also possible to filter by claim status (open, partially paid, written off, paid) and whether it has passed its due date or final date.
Usually the user wants to filter by open claims.
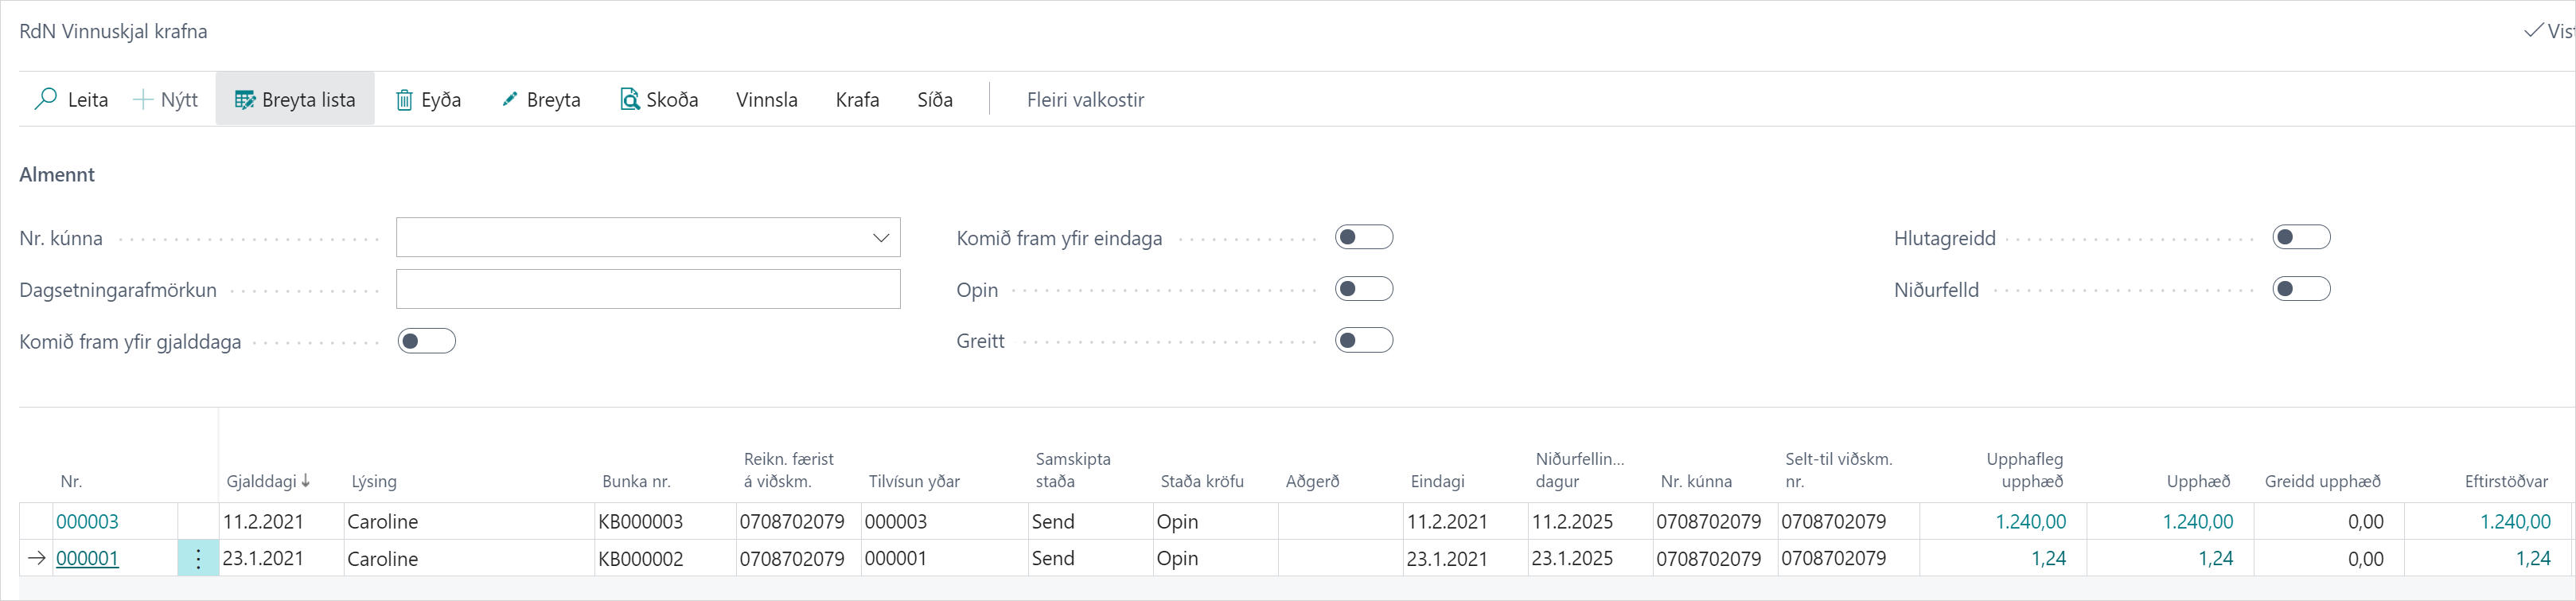
You can cancel or update a selected claim if the user is working with only one claim at a time.
If the user wants the system to work automatically, then claim suggestions should be used on the Claim Batch.
2. Cancel Claim Manually:
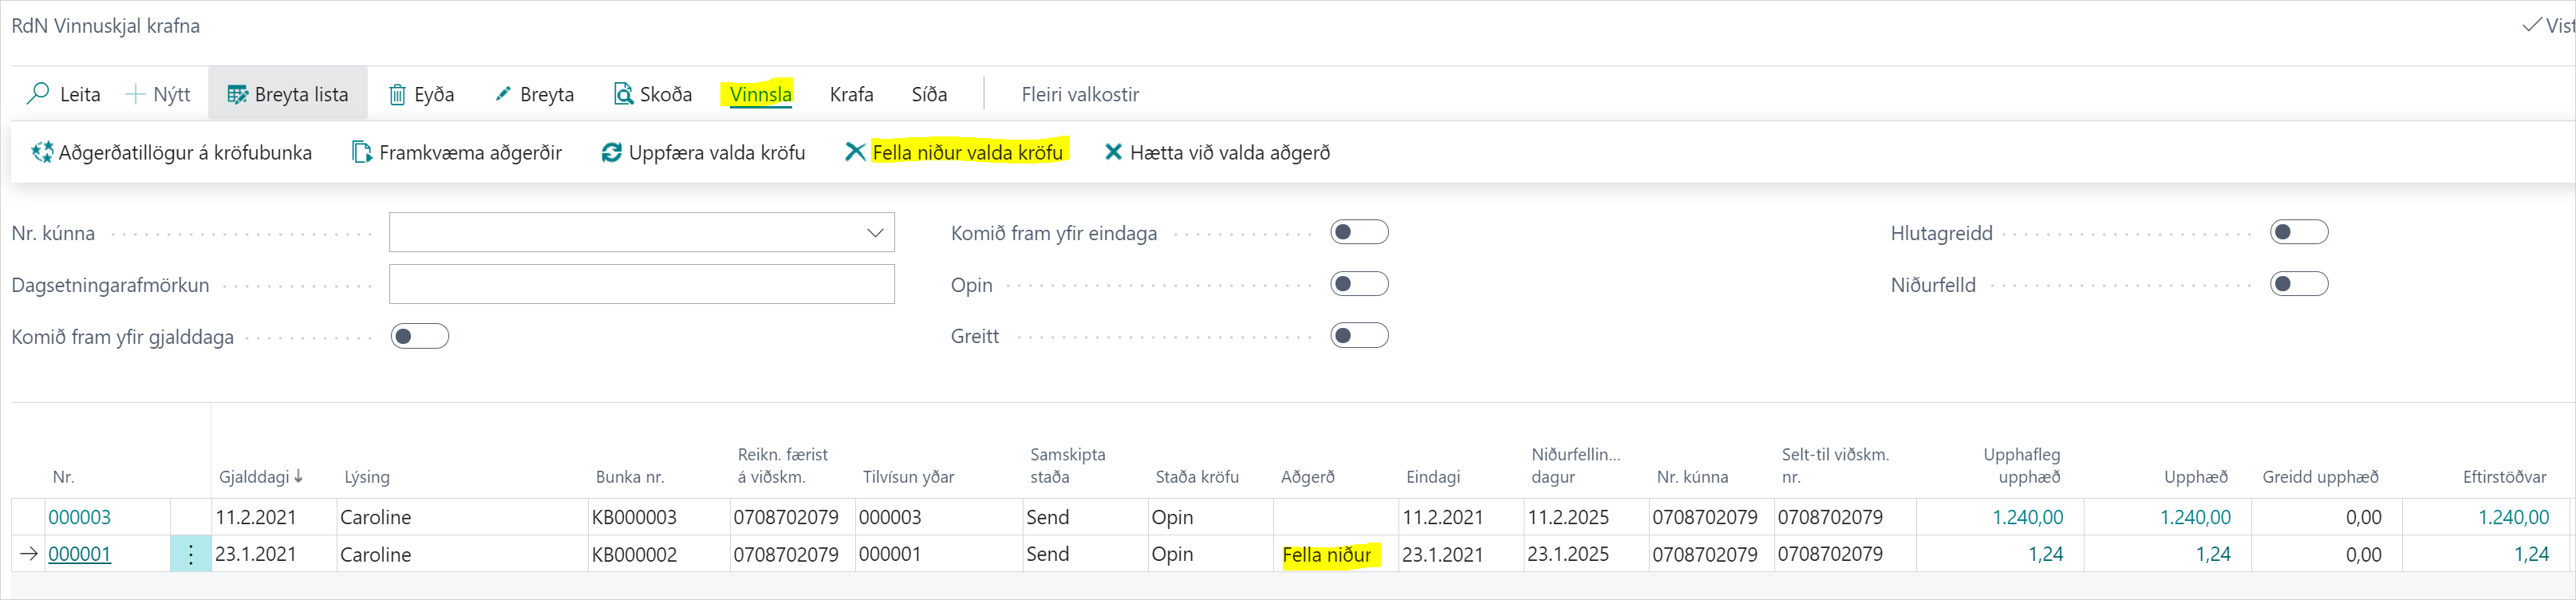
You can select the claim and then Processing - Cancel Selected Claim. Then the claim is marked as "Cancel" in the Action field and when actions are completed, the status of the claim changes to "Cancelled".
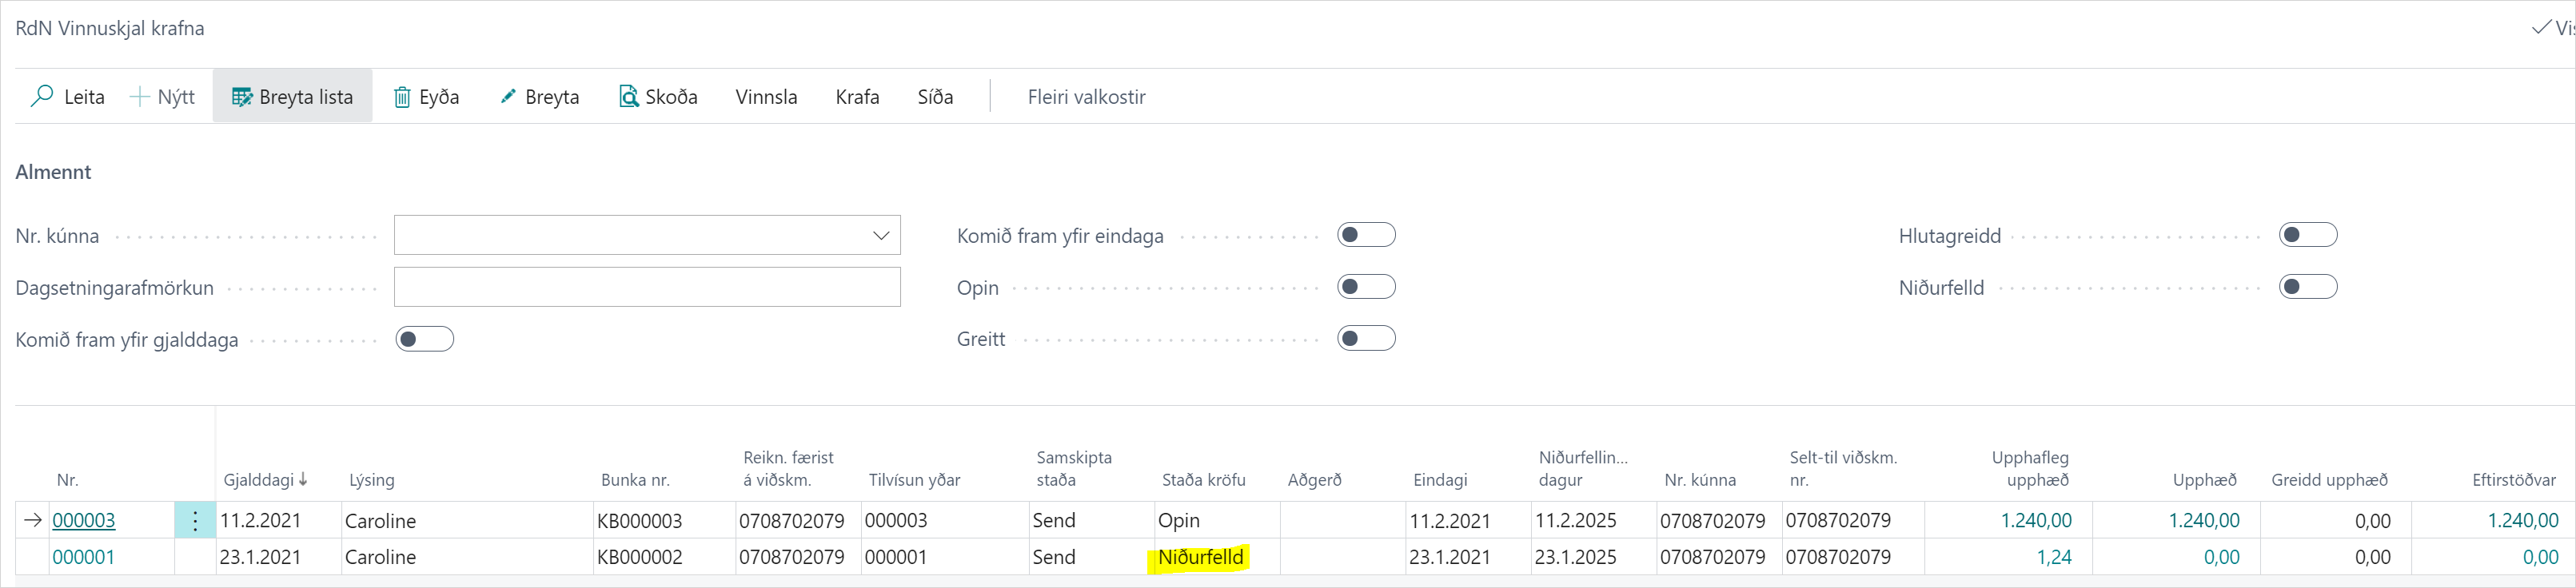
It is no longer possible to create the same claim again, update or pay in to a cancelled claim. If the cancel was a mistake, you should create new claims again for the same account by checking "Re-create Claim" in the "Create Claim" action. See a more detailed description here.
3. Update Claim Manually:
You can select the claim and then Processing - Update Selected Claim.
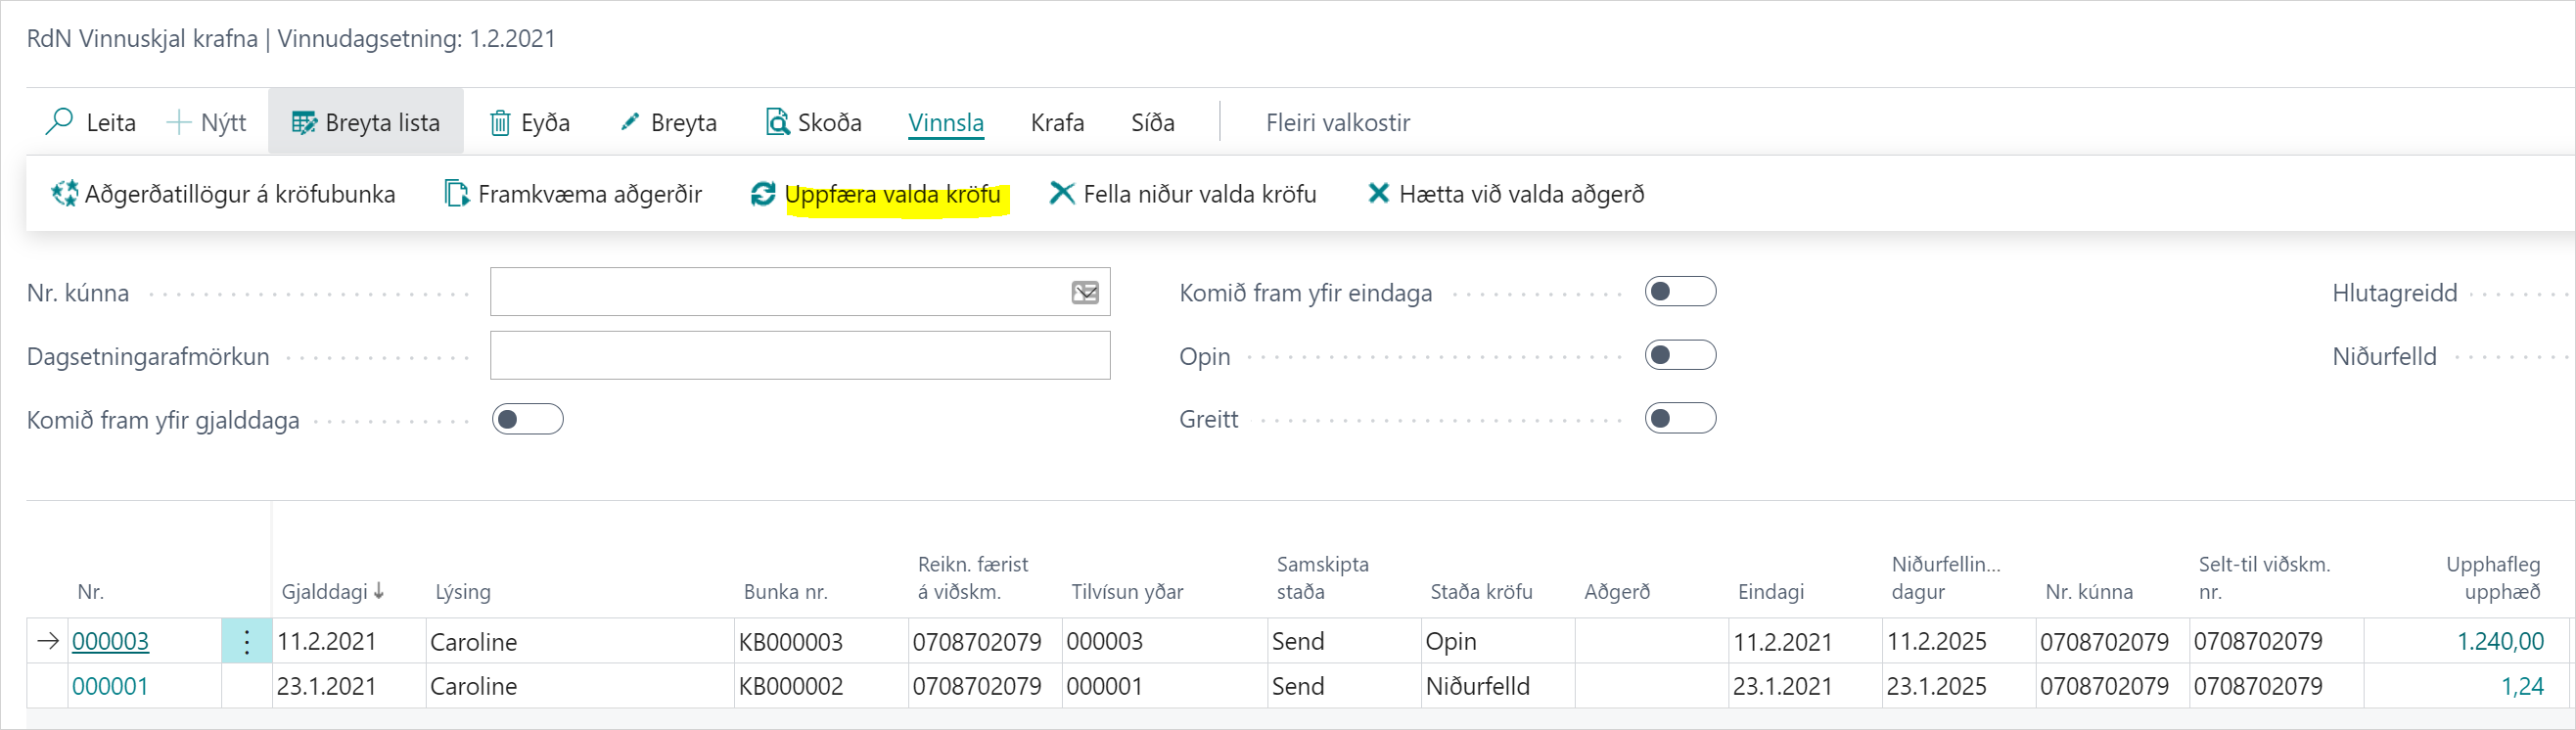
In reality, you can only change the final date manually, not the amount.
So first you change the final date on the claim and then the system automatically fills in the "Operation" field with the value "Update" and the "Communication Status" field with "Unsent".
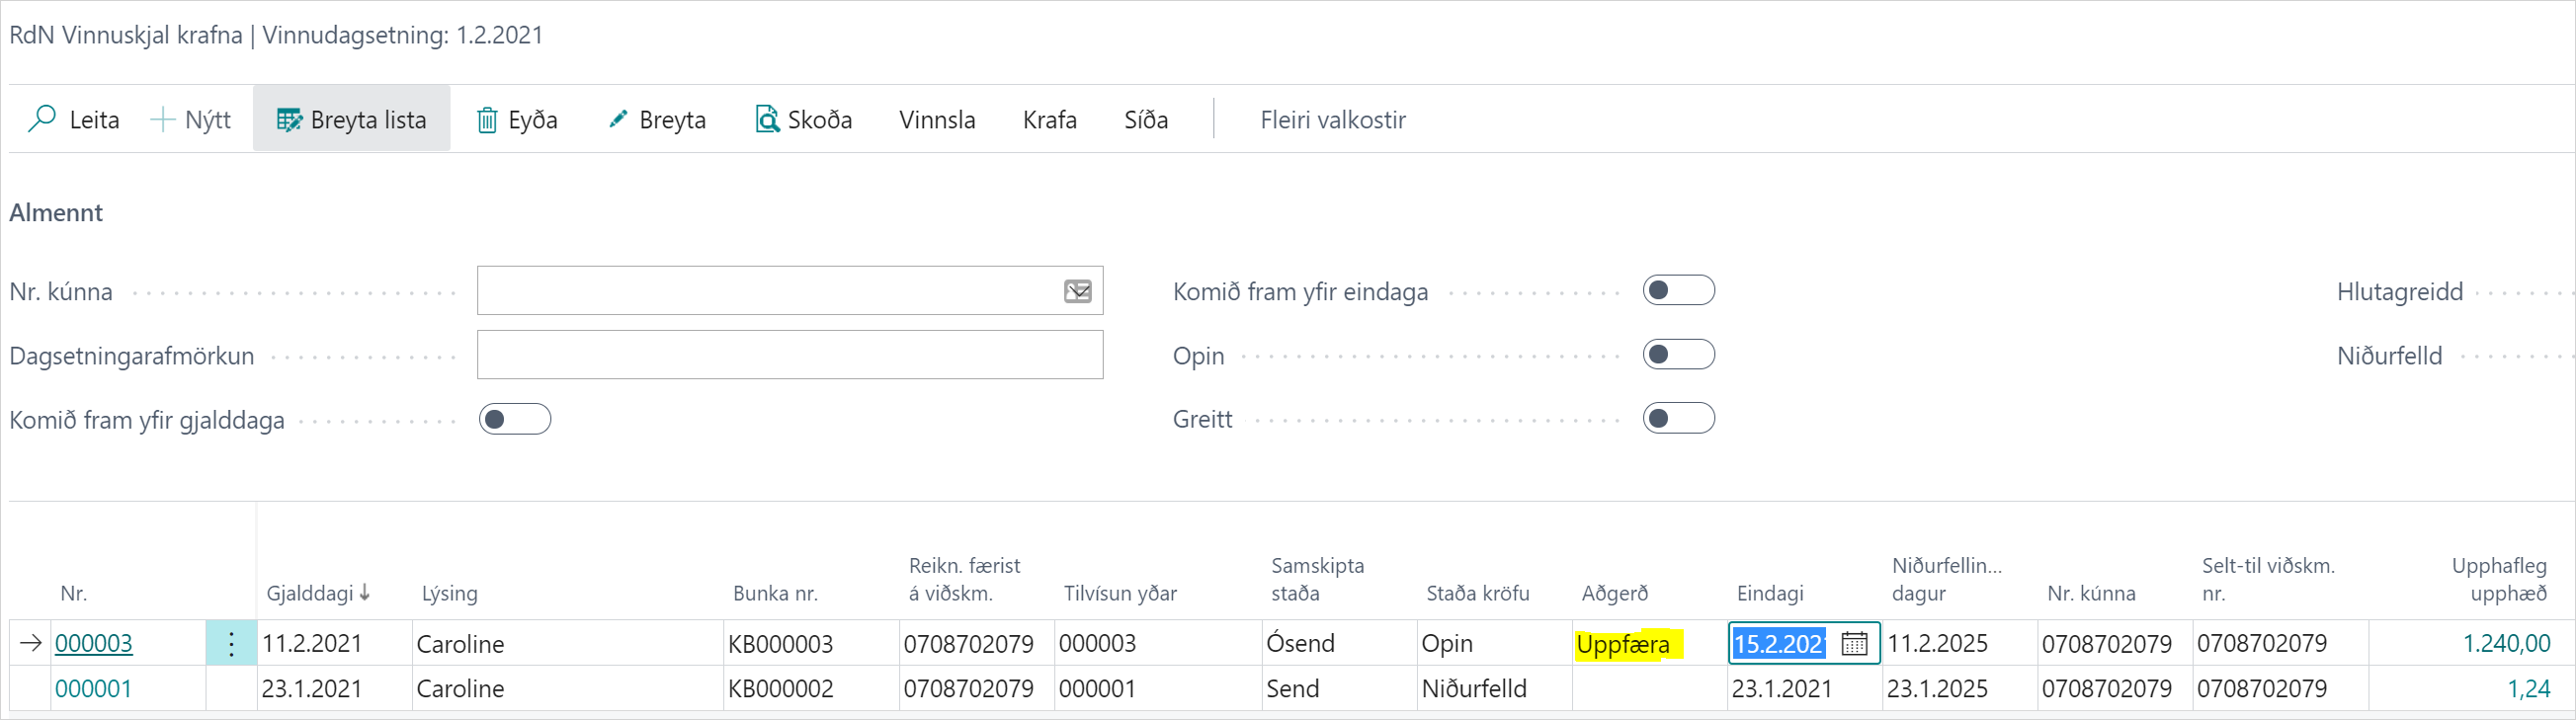
When actions are completed, the status changes to "Sent" and the final date has been updated in the bank.
4. Claim Suggestions on Claim Batch:
4.1. Use Operation Suggestion to Cancel Claim:
The operation suggestions is based on outstanding amounts on customer entries.

So first you need to create a credit invoice and settle it against the sales invoice so that the outstanding balance becomes 0.

Then the system will suggest writing off the claim based on this customer entry.
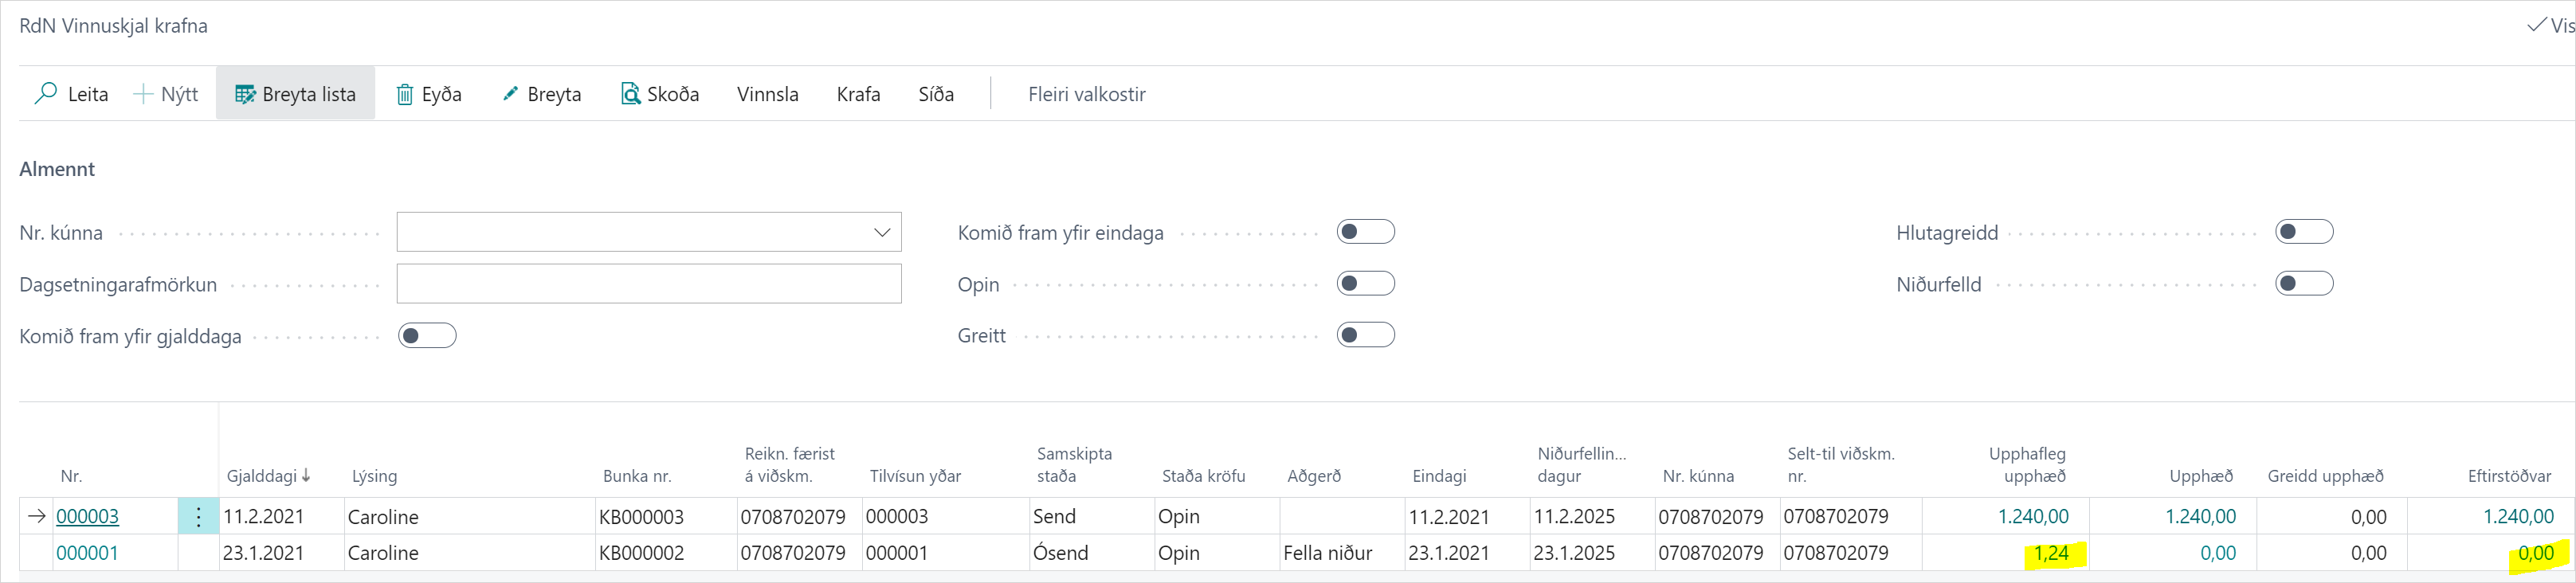
When actions are completed, the status of the claim changes to "Written Off".
4.2. Use Operation Suggestion to Update Amount on Claim:
The operation suggestions is based on outstanding amounts on customer entries.
So first you need to create a credit invoice or post a payment on a sales invoice and settle it against the sales invoice so that the outstanding balance changes. This could be an example where part of the goods has been returned or where the customer has paid part of the sales invoice by transfer past the claim.

Then the system will suggest updating the amount of the claim according to the outstanding balance of this customer entry.
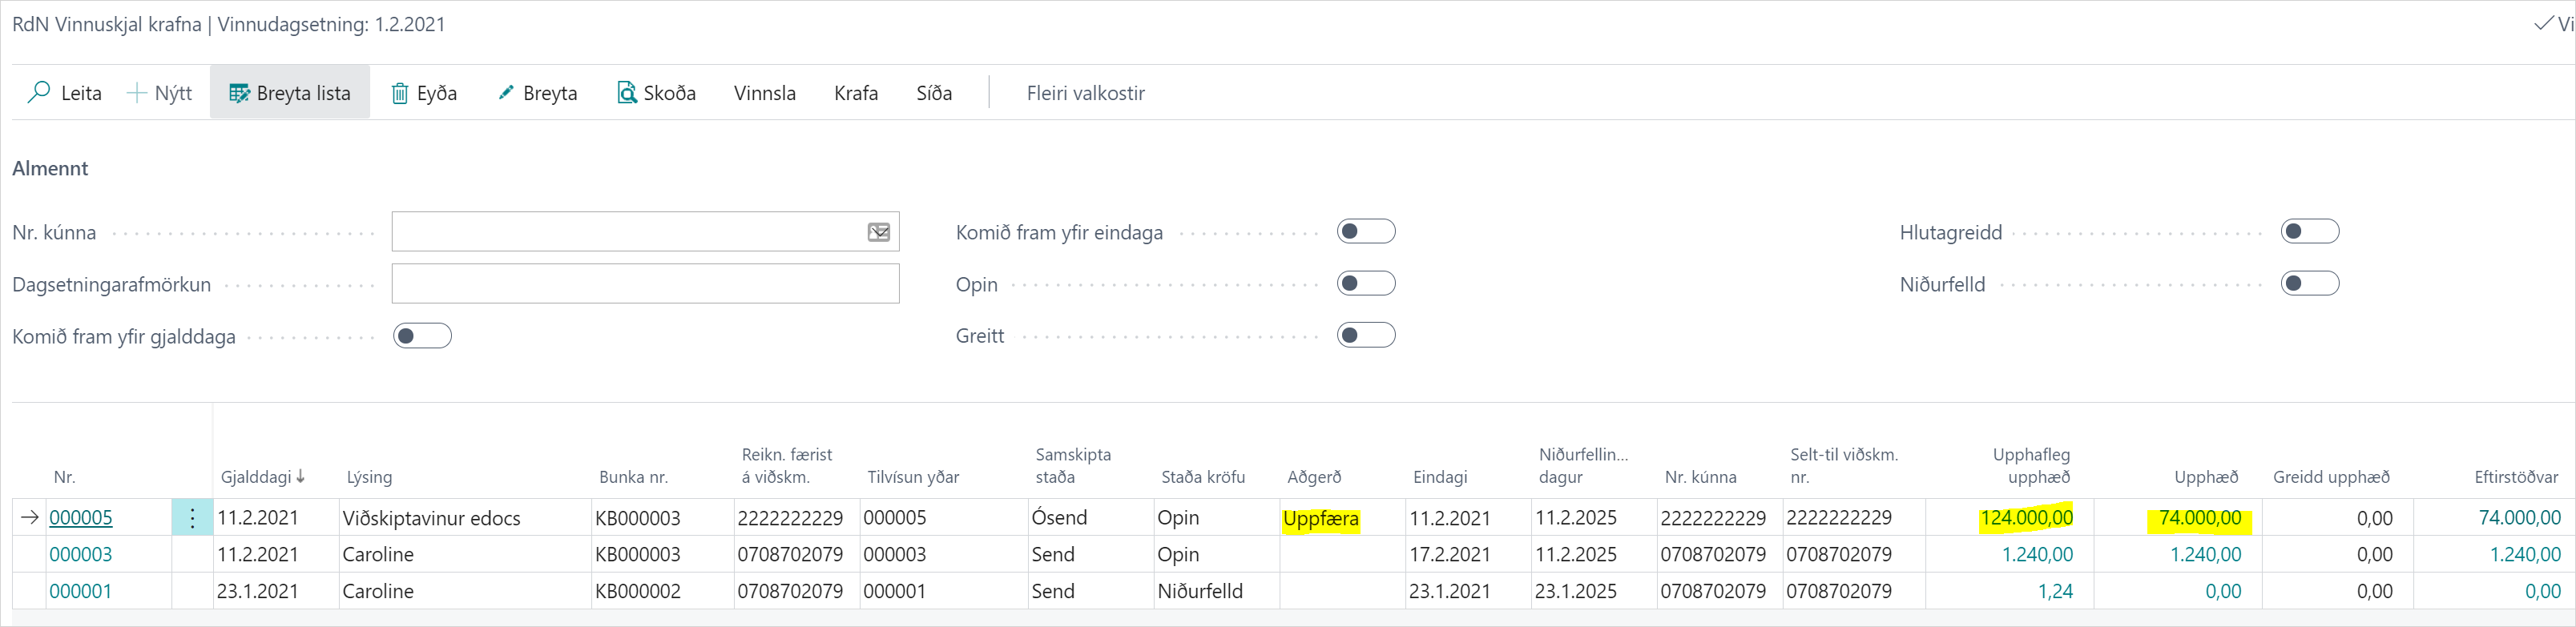
When actions are completed, the status of the claim is still open but the amount has changed to the outstanding balance.
5. Get Claim Status:
You can use this action if a claim has accidentally been handled directly in the bank (e.g. written off or updated in the bank, not from Dynamics 365 Business Central).
By using this action, you can get the claim status so that all claims match their status in the bank.

Similarly, you can use the "Check Claim Batch Status" action from the Claim Batch to update the status of all claims within the Claim Batch.
6. Read Claims from Bank:
In case the company is adopting a new system and has unpaid claims in the bank that were created from another system, you can retrieve them from the bank.
It is best to create a Claim Batch for older claims and retrieve them there.
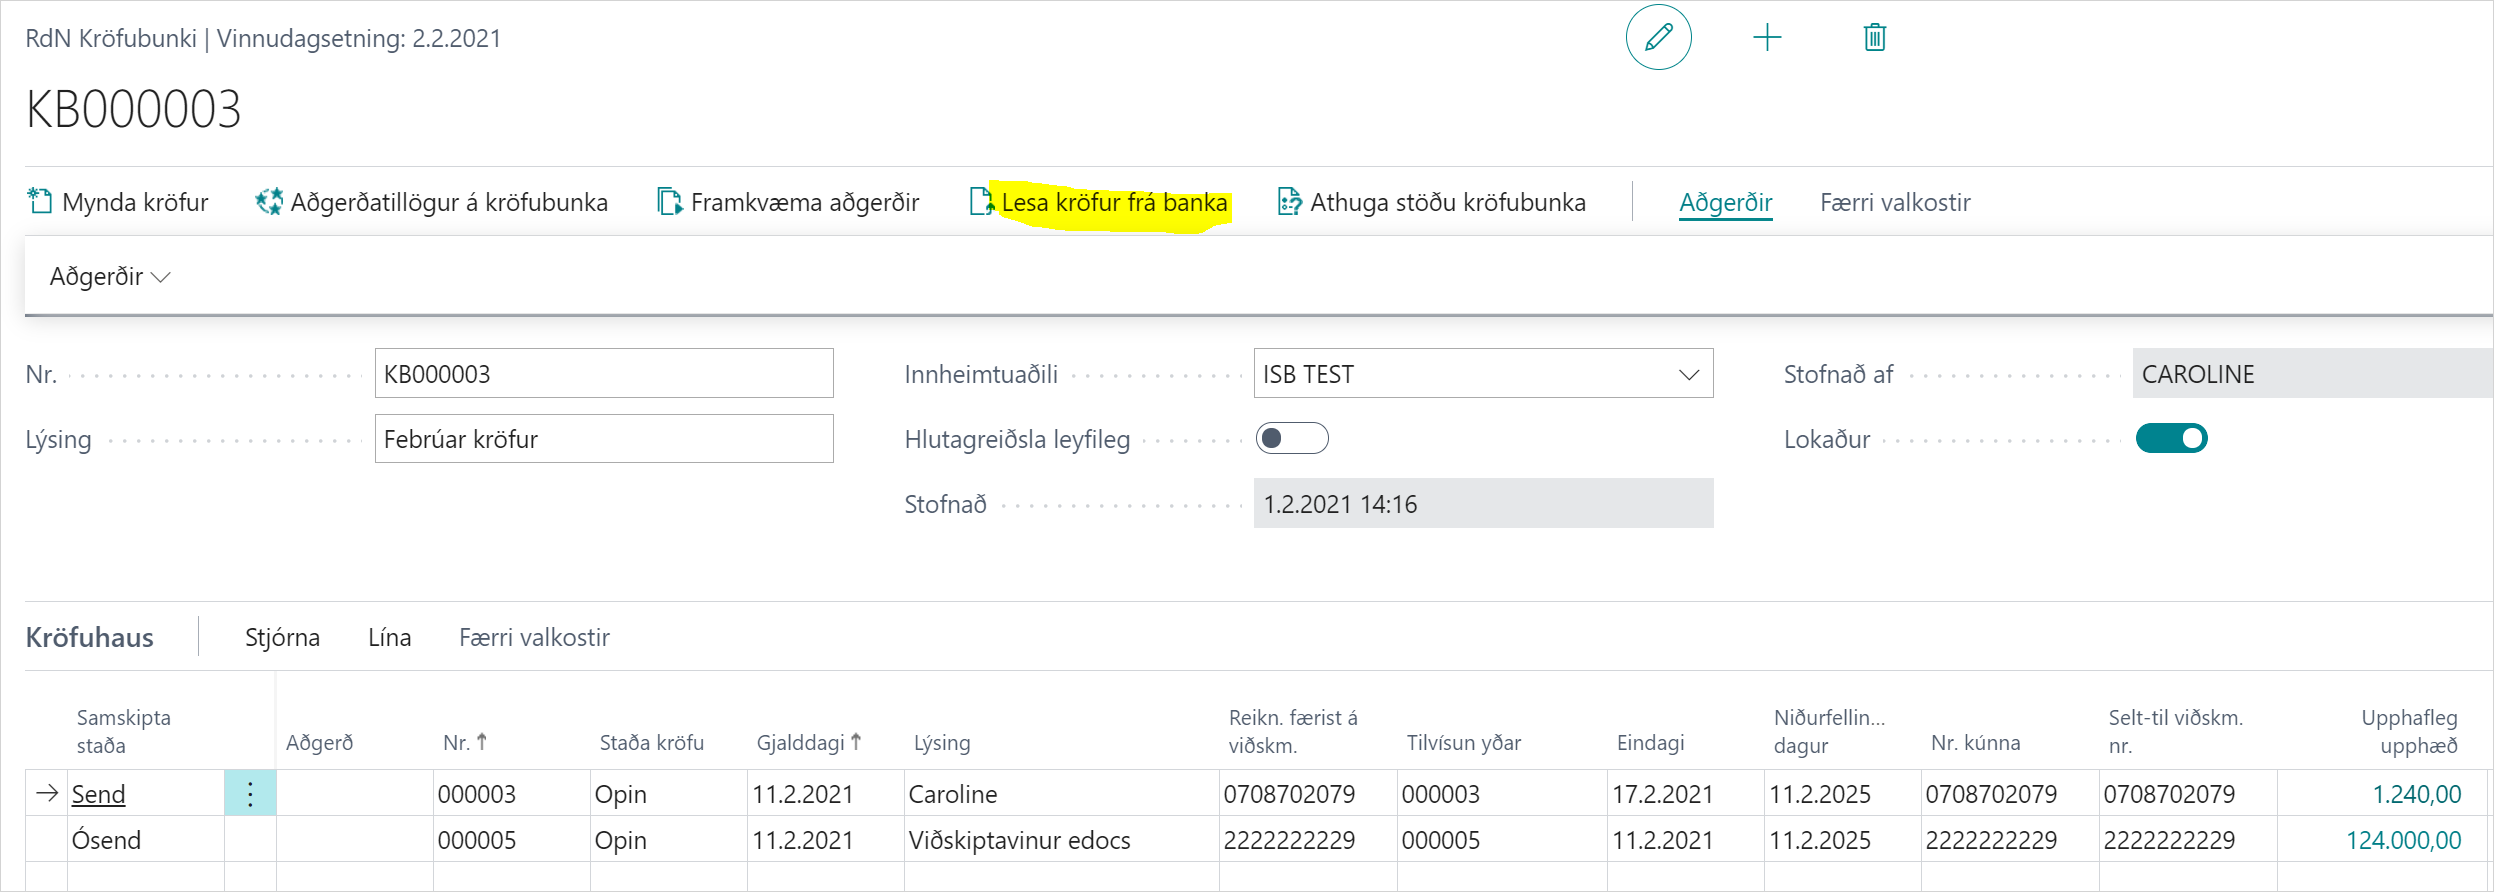
By retrieving claims from the bank, you can continue to handle them directly from Dynamics 365 Business Central (read in claim payments, drop...) and thus use the automation in the Banking Module to handle the claim against the bank and post payments.
7. Run Claim Suggestions and Perform Operations Automatically
It is possible to set up a job queue to run these actions automatically.
You must create a new job queue entry on Codeunit 10041507 for the version retrieved via appsource and 10039507 for the onpremises version.
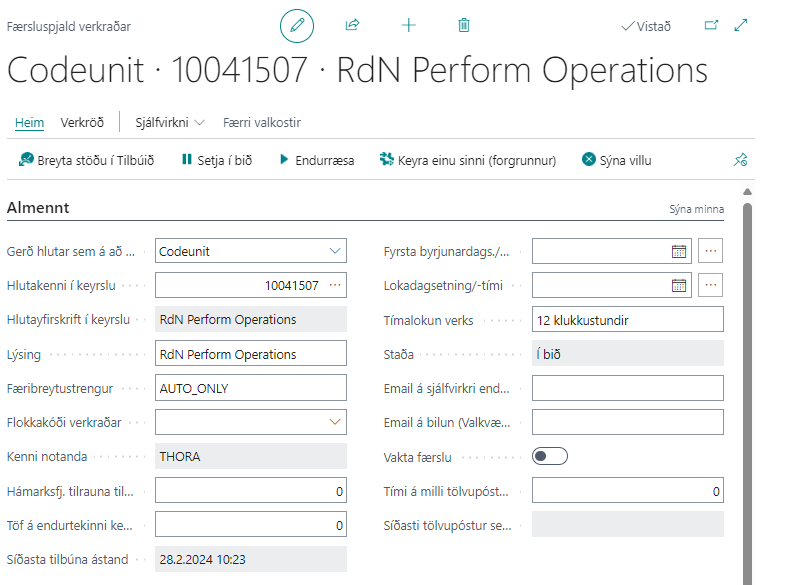
For these actions to be run only on Claim Batches created automatically, either after posting sales invoices, or by other job queue entries, then type AUTO_ONLY in the Parameter String field.
Finally, a job queue entry is set to Ready and the processing is monitored.