
Set up Banking with assisted setup
This page is for administrators and consultants who set up Banking for the first time. The assisted setup takes you through every core setting in one flow and ends with a summary of what is done and what is missing.
Purpose
After the setup, Business Central can talk to the bank: bank accounts are linked to a bank service, users are registered with the bank, and the core settings for claims, payments and reconciliation exist. Each setting also has its own page, so you can change it later without going through the flow again.
Prerequisites
- Banking is installed and the company has a licence from Rue de Net.
- You have the API key, client certificate name and bank connector URL from Rue de Net.
- The company has B2B access at each bank it uses.
- G/L accounts for interest, charges, late fees and capital gains tax exist.
Permissions
You need permission to change Banking settings, bank accounts, number series and journal templates.
Steps
Open Assisted Setup and choose Setup Rue de Net Banking. Your data is saved as you go, so you can stop at any time and continue later.

-
Welcome. Choose Next. If the setup is already done and you only need to register your own bank user, select Only create bank user. You then go straight to the bank user registration.
-
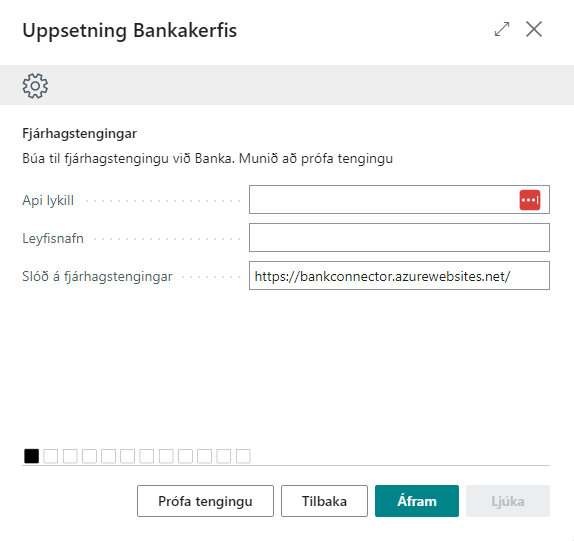
Bank Connector. Enter Certification Name and Fjárhagstengingar Base Path and choose Register API Key. See Bank connector.
-
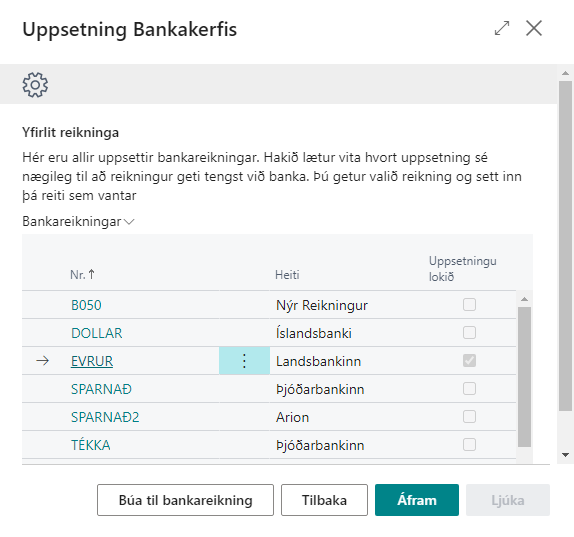
Bank Account Overview. This lists all bank accounts. The check mark shows whether an account is set up well enough to talk to the bank. Choose Create Bank Account to add an account, or choose an account to open RdN Quick Bank Account Setup. See Bank account.
-
Claims No. series. Choose Create Number Series to create number series for claim batches and claims, or select existing number series.
-
Claims payment setup. Select the Collection Bank Account and whether claims allow partial payment, add an invoice fee, and are created or imported automatically.
-
Claims dates. Enter Final Due Date Calculation and Cancelation Date Calculation as a date formula, for example
2Dor48M. -
Claim Journals. Select the journal template and journal batch for claim payments.
-
Claims Account. Select Interest GL Account, Charge Amount GL Account and Capital Gains Tax Account. These accounts are used when claim payments are moved to a cash receipt journal. See Set up claims.
-
Payments. Choose Create Number Series or select a number series in Payment No. Series, select the Default Bank Account and whether payments are paired with claims.
-
Payments - Balancing Accounts. Select Charge Amount Bal. Account, Interest Bal. Account and Late payment fee Bal. Account. See Set up payments.
-
Reconciliation. Choose Create Number Series or select a number series in Reconciliation Nos., and enter Max Date Diff. in Rec., for example
3D. See Set up reconciliation. -
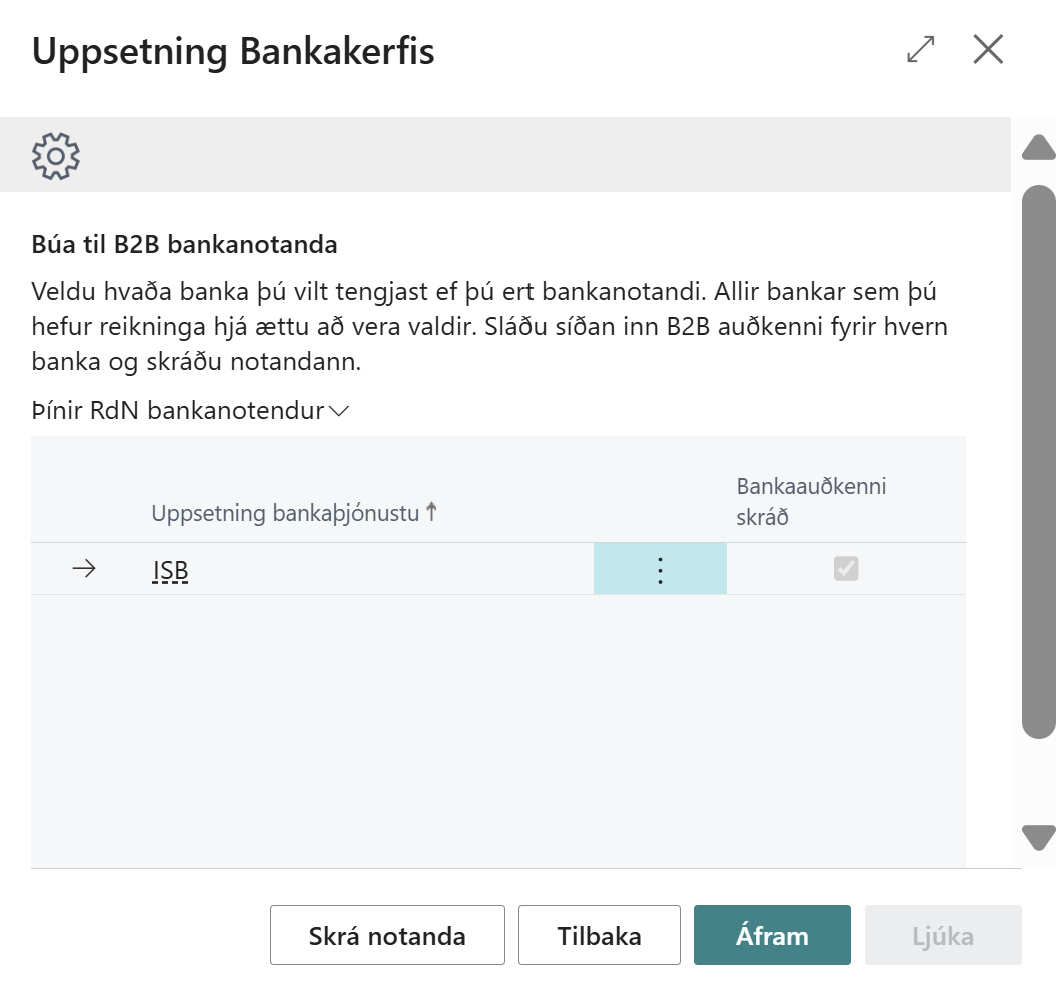
Create B2B bank user. Select the banks the company uses, enter the B2B user name and password for each bank and choose Register User. Other users register later on the Your RdN Bank Users page. See Bank users.
-
Finished. Review the summary and choose Finish.


Verify
The summary in the last step shows the status of each part:
- ✔ means the part is filled in, for example ✔ Connected to Bank API successfully or ✔ Claim setup completed.
- ✖ means something is missing, for example ✖ No Bank Account has finished setup.
- ⚊ means a bank connection was not chosen.
✔ only means the fields are filled in, not that the values are right. So test the connection on the RdN BankConnector Setup page and fetch bank entries or unpaid claims to confirm that everything works.

All messages are in Help.